Recipe: chocolate pots (or chocolate pudding)

IMG_0006.jpeg

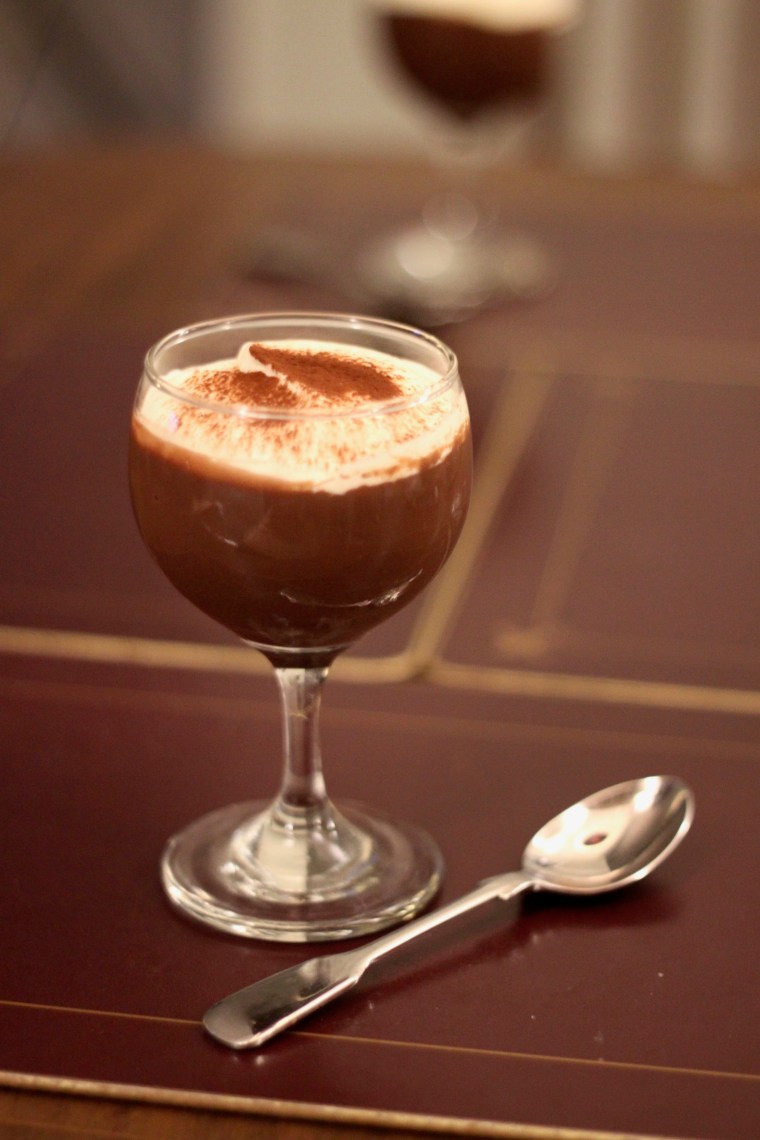
These chocolate pots are a childhood favourite of mine, and this version with actual chocolate (and not just cocoa) is the best one I’ve come across yet. Mamma found the recipe in a cookbook by Anna Bergenström and kindly passed it on me.

IMG_0021.jpeg

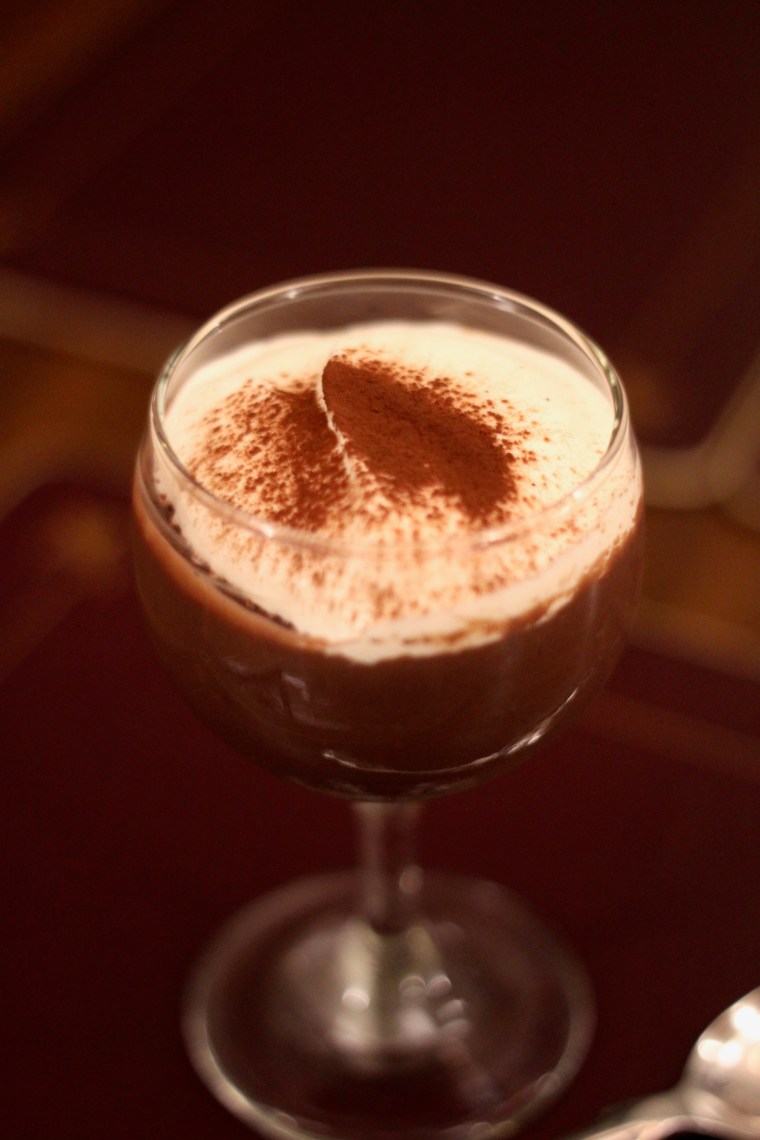
I like these really cold with pillowy cream on top and preferably sprinkles on top of that for a hint of sweetness and crunch, but it probably looks more grownup like this, with just some sieved cocoa powder on top!

When I made these for two of my American friends, they told me these are called chocolate pudding in the US (just like the Swedish name!), whereas here in the UK a pudding is any dessert.

IMG_0040.jpeg

Chocolate pots (or chocolate pudding), serves 4

Adapted after and translated from Anna Bergenström’s recipe.

600 ml whole milk

75 ml corn flour

4 tbsp caster sugar

3 tbsp cocoa

1 egg

2 tsp vanilla

50 g dark chocolate

For serving:

lightly whipped cream

sieved cocoa or sprinkles

Add everything apart from the chocolate to a medium sized sauce pan. Bring it to a gentle simmer while whisking, until the mixture has thicken quite a lot. Stir or whisk continuously 

Break up the chocolate. Remove the sauce pan from the stove and add the chocolate pieces to the mixture. Stir until it’s melted. Pour the mixture into a sieve to remove lumps and pour into small bowls or glasses. Cover them with cling (all the way down to the surface) and leave to cool. When cool, place in the fridge for 3 hrs to thicken. Serve with lightly whipped cream and either sieved cocoa or sprinkles.

Recipe: crispy rice paper with salmon, avocado and spicy mayo

IMG_9747.jpg

This is a new favourite starter of mine! I just adore the combination of crunchy fried rice paper (which is much more delicate here than in a prawn cracker) and smooth raw fish and the fresh toppings. Such a lovely mouthful with lots of subtle flavours coming together. And it pairs perfectly with a glass or two of bubbles, if you need an excuse to open a bottle.

IMG_9752.jpg

A note on raw fishÖ Most fish we buy in the supermarkets as fresh have been frozen in transport killing off any bacteria. But if you’re worried ask the people at the fish counter for sushi fish so they know you’re going to eat it raw.

Or, buy a nice piece of salmon and freeze it for 48 hours, and defrost it slowly in the fridge and you won’t even notice it’s been frozen but you know you’re safe from bacteria.

IMG_9784.jpeg

Crispy rice paper with salmon, avocado and spicy mayo, serves 2

2 sheets rice paper 

500 ml neutral oil 

80 g raw salmon

1/4 cucumber, peeled and cut into small triangles 

1/2 avokado, thinly sliced

100 ml mayonnaise, homemade or Hellman’s

1/2-1 tsp gochujang or 1-2 tsp soy sauce

fresh coriander, finely chopped

1/2 red onion, pickled 

Pour oil into a large saucepan, approx 2,5 cm high. Heat it to 180C. Fry one rice paper at the time and let it puff up. It takes approximately 5 seconds. Remove with tongs and drain on kitchen roll. Let the oil cool before you dispose of it. 

Cut the fresh salmon (or freeze it for 48 hrs and slowly defrost it, to kill off any bacteria) in 2 mm thin slices. Mix mayonnaise with gochujang (or soy sauce for a milder flavour). 

Break each puffed up rice paper in approx 5 pieces, most important is that the pieces are big enough to hold the toppings. Start adding the toppings first avocado, then salmon, followed by cucumber and radishes. Pipe or spoon on the mayonnaise (I put it in a small ziplock bag and made a tiny whole in one corner for piping). You can make both mayos and do half and half too. Top with pickled red onions and chopped coriander. Serve with napkins!

Recipe: open crab lasagne with white wine and tomatoes

IMG_9806.jpeg

Sometimes recipes, or recipe ideas – to be more exact, pop into my head without any context (or warning) at all. But then I do think about food an awful lot… This open crab lasagne happened just like that. I was thinking of what I could cook for the weekend and suddenly this idea formed of an open crab lasagne.

And it turned out really well! The white wine, cream and tomatoes compliment the crab beautifully without overpowering the seafood. I really wanted this dish to taste of fresh crab, although in a ‘pasta with a creamy sauce’ kind of setting. And I find it genius using lasagne sheets like this (obviously not my idea in the first place), as it puts the focus on the crab and not the pasta. I hope you enjoy this little dish of mine as much as I did!

IMG_9808.jpegIMG_9816.jpeg

Open crab lasagne with white wine and tomatoes, serves 2

4 lasagne sheets 

1 tbsp butter + 1 tbsp neutral oil 

approx 120 g cherry tomatoes, cut in half 

50 ml white wine

150 ml double cream

1/4 vegetable stock cube

100 g fresh crab meat (white and brown)

1/2 lime, zest only

dill, finely chopped + extra for serving 

parsley, finely chopped

salt & pepper

dried edible flowers for serving (optional)

Boil the lasagne sheets until soft in salted water. Heat up a non-stick frying pan, add butter and oil and when melted the tomatoes. Let them caramelise and soften for approx 5 minutes. Pour in the wine and let it boil for a minute or two. Add the cream and the stock cube and stir. Let it thicken for a few minutes. Add lime zest and season to taste. Add half the crab meat and all the herbs (apart from the garnish).

Place two low bowls or plates near the stove. Take one lasagne sheet at the time and place it in the frying pan to coat it with sauce. Move it to the bowls/plates and place one, a bit folded over, on each plate. Add a spoonful more of sauce on each plate. Place the second sauce-covered lasagne sheet in the bowls slightly overlapping the first one. Add more sauce and divide the crab meat. Decorate with dill and dried flowers. 


Recipe: rhubarb custard tarte

78AA7683-0740-4C1D-9920-0025DB188698.jpg

Spring. For me it’s about feeling the sun on my face. Shedding a few layers of clothing and watch all the flowers blossom.

And I get terribly excited about the fresh produce. First the wild garlic, then the asparagus, rhubarb and new potatoes.

At the moment we can enjoy all these things and it makes me rather giddy with happiness! FINALLY winter (although it wasn’t an awful one in London this year) is over!

To celebrate the arrival of Yorkshire rhubarb to the shops a few weeks ago I made a lovely puff pastry tart with pink lovely rhubarb (cooked just enough to still be a little firm) and a glorious custard. Eating this in the sunshine makes me so happy!

Custard rhubarb tarte, serves 6-8

Translated from and adapted after Tidningen Hembakat’s recipe.

1 roll all butter puff pastry

Custard (oven proof):

1 vanilla pod or 1 tsp vanilla

300 ml milk

50 g caster sugar

3 egg yolks

50 ml corn starch 

25 g butter

Warm milk, sugar and vanilla in a nonstick saucepan. Mix the egg yolks with corn starch in a bowl. Add the warm milk to the egg mixture a little by little. Then return the mixture to the saucepan and warm on medium heat until the mixture has thickened, approx 2 minutes. Whisk continuously. Remove from the heat and stir on the butter. Pour into a bowl, cover with cling (all the way down on the mixture) and leave to cool. 

400 g rhubarb, trim the ends

200 ml water

200 ml caster sugar

Cut the rhubarb into 4 cm long pieces and place in an ovenproof sig with sides. Bring sugar and water to the boil in a saucepan. Pour the syrup over the rhubarb and place in a 100C oven for 20 minutes. Leave to cool completely. 

Assembly: 

Roll out the puff pastry and place on a parchment paper lines baking sheet. Cut a thin incision only along the surfaces of the dough, approx 2 cm in from the edge, all around the dough. Prick the dough inside of the “frame” with a fork. Pre-bake the dough for approx 7 minutes (it should bake a bit but not colour) in a 200C oven. 

Remove from the oven and spread a thick layer of custard onto the dough inside the “frame” and place the rhubarb pieces on top with a little space in between. Bake for another 12-15 minutes until golden brown. Remove from oven. Leave to cool and dust with icing sugar before cutting into smaller pieces and serving.

Recipe: salted butter chocolate chunk shortbread cookies

IMG_9654.jpg

You might have heard about these cookies already, as they almost broke the internet? If so, see this as a friendly reminder to bake them again. And if not, you’re in for a treat!

Quite literally of course, because these salty buttery cookies with chocolate chunks and a lovely edge of crunchy demerera sugar are INSANELY good. I’m obsessed and can’t wait to bake them again although I sort of know that it’s a bad idea because I will eat them all.

IMG_9635.jpg

I think Aliso Roman has invented the PERFECT cookie, which is no small feat. So if you haven’t already, start baking! They’re really easy to make and the reward is HUGE!

APC_2794.jpeg

Salted butter shortbread chocolate chunk cookies, makes 24

Adapted from Alison Roman’s recipe via Smitten Kitchen.

255 g salted butter, cold, cut into small pieces

100 g caster sugar

50 g light brown sugar

1 tsp vanilla

295 g plain flour

170 g dark chocolate, chopped (you want chunks, not thin shards of chocolate)

1 large egg

demerara sugar, for rolling

sea salt flaked for sprinkling

Beat the butter, caster sugar, brown sugar and vanilla with an electric mixer until light and fluffy, scraping down bowl as needed. Add flour, and mix just until combined. Add chocolate chunks, mix just until incorporated. Mixture will look crumbly.

Divide between two sheets of parchment paper or cling and use your hands to form the dough halves into log shapes about 5 cm in diameter. Chill until firm, about 2 hours.

When you’re ready to bake the cookies, heat your oven to 180°C. Line a baking tray with parchment paper. Lightly beat the egg and open up your chilled cookie logs to brush it over the sides. Sprinkle the demerara sugar on the open paper or plastic wrap and roll the logs into it, coating them.

Using a sharp serrated knife, cut logs into 1 cm thick rounds. You’re going to hit some chocolate chunks, so saw gently, squeezing the cookie to keep it from breaking if needed. Arrange cookie slices on prepared sheets a few cms apart and sprinkle each with a few flakes of salt. Bake for 12 to 15 minutes, or until the edges are just beginning to get golden brown. Let cool slightly before transferring to the cookies to a wire racks to cool down.

Recipe: baked Vacherin Mont d’Or

IMG_9552.jpg

Anyone else who LOVES melted cheese?! Well, then this is for you. Cheese haters, please look away now.

I’ve only had this amazing cheese (seriously, it’s HEAVEN!) in restaurants before but thought it would be a good supper for Valentine’s Day, especially since we were going to the theatre but needed to eat something afterwards.

This beauty of a cheese; Vacherin Mont d’Or, is a French unpasteurised cheese and is only produced during the winter months (until March or so). The reason for this is that the same cows whose milk normally goes towards the production of Comté and Gruyère, are on a different diet in the winter and so their milk tastes different and is perfect for making this creamy dreamy cheese.

IMG_9562.jpg

IMG_9551.jpg

It’s quite gooey at room temperature but when baked it becomes the best cheese fondue (see below picture) and is both gooey and rich AND light at the same time. The recipe I used is courtesy of David Lebovitz and is of course completely fool proof and the only guidance one needs.

So what to eat with these cheese?! We had a lot of bits for dipping; prosciutto, cooked ham, bresaola, saucisson, cornichons, apple slices (Pink Lady and Granny Smith), crusty baguette and cold cooked new potatoes. Everything worked well, but my favourite was without a doubt the cold new potatoes. You must try it!

IMG_4606.jpeg

Baked Vacherin Mont d’Or, serves 4 as a starter or 2 as a main course

Adapted from David Lebovitz’s recipe.

1 Vacherin Mont d’Or cheese 450-500 g, at room temperature

1 clove garlic, peeled and thinly sliced

60ml dry white wine

Preheat the oven to 200ºC. Wrap the container of cheese securely in foil, making sure to enclose it so the foil goes up to the top of the outside of the container, but leave the top exposed. Set the wrapped cheese on a baking sheet.

Poke eight-to-ten slits in the top of the cheese with a paring knife and slide the slivers of fresh garlic in them. Pour white wine over the cheese, and bake the cheese until it’s very hot – it will take between 20 and 30 minutes.


Recipe: slow cooked venison with Hasselback potatoes and cream sauce

IMG_2035

In between Christmas and New Year back in Sweden we cooked venison one night, using a recipe from a Swedish cook who also likes to go shooting so I really trust his game recipes.

The original recipe called for elk meat but it worked just as well with venison. The cut is near or around the rump; one that needs to cook slowly to become tender. So this will take a bit of time but it’s not difficult at all and definitely worth it. The tender meat and the creamy sauce (with all the jus from cooking the meat) is just amazing. Serve with Hasselback potatoes and broccoli and tarte tatin and vanilla ice cream for dessert. So yummy!

Slow cooked venison with Hasselback potatoes and cream sauce, serves 6

Translated from and adapted after Per Morberg’s recipe in the book Morberg Lagar Vilt.

1 kg venison rump (off the bone)

salt and pepper

1 carrot

1 onion

1/2 leek

3 tbsp tomato purée

300 ml game stock

200 ml red wine

2 bay leaves

1 sprig thyme

6 juniper berries

Creamy sauce:

the jus from the meat

500 ml double cream

3 tbsp blackcurrant jelly

salt and pepper

Trim the meat and rub in plenty of seasoning. Brown the meat on all sides in a large casserole dish.

Cut the carrot and onion in large pieces. Wash the leek and cut it into large pieces as well. Add it all to the casserole dish and let it brown for a few minutes. 

Add tomato purée, stock, wine and herbs. Bring to the boil, then lower the heat until simmering and let it simmer with the lid on until cooked through (until the meat is 65-70 C in the middle), approx 45-60 minutes (maybe more). Turn the meat and baste it a few times. Remove the steak from the casserole pan and cover with tin foil.  

For the sauce: sieve the jus and pour it into a clean saucepan together with the cream. Bring to the boil and let it slowly thicken. Stir occasionally. Add the jelly and season to taste.

Cut the meat into thin slices across the grain of the fibres. Serve with the sauce and Hasselback potatoes.


Recipe: Italian meringue covered fruit

IMG_9830.jpeg

IMG_9833

This is a perfect Friday night pudding as it’s quick to whip up (don’t let the Italian meringue scare you, I promise it’s easy!) and feels really fresh after a pizza or whatever Friday night cravings you may have.

Use any (seasonal) fruit and berries you like – they don’t get warm even if you use the grill to brown the meringue, but it’s even easier with a creme brûlée torch, and then you could also put the fruit in a glass so you can see it. Very pretty!

IMG_9829

APC_2966.jpeg

Italian meringue covered fruit, serves 2

Mixed fruit, cut into pieces and berries (enough to almost fill the vessels you’re using), such as:

1 blood orange

1 apple

blueberries

raspberries

Italian meringue:

1 egg white

75 ml caster sugar 

75 ml water

50 ml caster sugar

To serve:

lightly whipped cream

Divide the fruit between two ramekins (or glasses if not using the oven) – they should be almost full. 

Pour 75 ml caster sugar and 75 ml water into a saucepan and bring it almost to the boil. Once the sugar has melted the syrup is done. Remove from heat. Meanwhile beat the egg white until fluffy with an electric whisk. Pour in some of the remaining sugar and beat some more. Pour in the syrup while beating continuously. Then add the remaining sugar and beat until you have a glossy meringue that is set enough that you can turn the bowl upside down without it sliding out. 

Use a spatula to cover the ramekins with the meringue. Put the grill on the oven to 250C and place the ramekins underneath it. Keep the door open and an eye on the ramekins as the meringue browns quickly and you don’t want it going too dark. Remove with mittens as the ramekins go warm (but the fruit inside doesn’t). Or skip this step all together and use a creme brûlée torch to brown the meringue. Serve with lightly whipped cream. 

Recipe: orzo with bacon, mushrooms and parmesan

APC_0614

When I think of this dish an image comes to mind, of Nigella in her silk dressing gown, opening that famous fridge door to get herself a late night snack. The leftovers from this dish would be perfect for midnight snacking and all you need is a bowl and a fork. But it’s really nice for supper a regular week night when you want something fast, easy and filling on the table in 15 minutes flat. It does that and more.

The comforting flavours of earthy mushrooms and salty bacon together with the silky orzo pasta comforts you from within. And it’s that comforting feeling that is sometimes most important for me when I cook for myself on a day that just feels a bit meh. May it be from the incessant London rain, the fact that the weekend feels far away or a rubbish day at work – regardless of the reason you will feel better after a bowl of this. Promise!

APC_0597

Orzo with bacon, mushrooms and parmesan, serves 3-4

200 ml orzo pasta (the one that looks like rice)

1/2 stock cube, vegetable 

200 g chestnut mushrooms, sliced

1 small garlic clove, finely chopped

ca 120 g bacon, cut into small pieces

150 ml creme fraiche

plenty of grated parmesan

salt and black pepper

Cook the orzo pasta in plenty of water. Add salt and half a stock cube to the water for extra flavour. Cook until al dente (approx 10 minutes or according to the time on the packet). Drain and pour the pasta back into the pan. Stir in some oil or a knob of butter so it won’t become one sticky lump. 

While the pasta is cooking, fry the mushrooms in butter and oil mon medium heat and make sure not to crowd them. If you have a small frying pan fry the in batches instead. Add the garlic towards the end of their cooking time. Add salt and pepper and transfer to a bowl. Then fry the bacon pieces on medium heat until crispy and brown. Drain on kitchen towel. 

Mix the creme fraîche into the pasta, then add the mushrooms and bacon. Mix well and add in some grated parmesan. Season to taste. Serve in bowl and top with even more parmesan.  

Recipe: nachos with chicken and chorizo

IMG_9721.jpg

Sometimes I can really crave nachos. And most of the time I long for the ones I had at Yankee Stadium a few years ago. Although probably really processed the tasted divine!

But the next best thing are definitely homemade ones, and these with chicken and chorizo are absolutely delicious! Also, the secret is in the cheese sauce so although it takes a bit of labour it’s SO worth it!

Nachos with chicken and chorizo, serves 2

ca 150 g salted tortilla chips

75 g chorizo, cut small

1-2 fried chicken thigh fillets, cut small

oil for frying

2-3 handfuls grated cheese

Toppings:

1 batch cheese sauce

1 batch proper guacamole

1 jar creme fraiche

Garnish:

Chopped tomato

Sliced spring onions

Pre-heat the oven to 200C. Fry the chorizo in oil on medium heat until they’re crispy. Add the chicken and let it absorb the chorizo flavoured oil.

Cover the base of an oven-proof dish with a thin layer of tortilla chips, top with cheese, chorizo and chicken. Repeat with another layer. Place in the oven for the cheese to melt, approx 5-10 minutes. 

Pour the cheese sauce on top (make this while the nachos are in the oven), guacamole, creme fraîche and the chopped vegetables.